Show the Permalink short form below your WordPress post

You can put a short form of Permalink at the bottom of all WordPress posts with just a little coding. This post will be useful for those who do not use Permalink’s default option. The default option of Permalink is https://tortoiz.wprashed.com/the-best-wordpress-theme-for-building-a-portfolio-site/ . However, many use different permalinks. But if your blog is in English then there is no problem. And if your blog is in another language and the URL is written in another language, then your URL will be much bigger when you copy the URL to give to someone from the address bar of your browser. E.g.

https://tortoiz.wprashed.com/2019/12/06/%E0%A6%AB%E0%A7%87%E0%A6%B8%E0%

Sharing such a big URL is a lot of trouble. If you visit the site while you are logged in, you can use the default shortlink option in WordPress. But your visitors ??? Would they like to share such a big link with someone? Of course not. So for them, you will show how to put this short link at the bottom of each post. However, many here will say why use the code to have the plugin? That is what you want to do. Many people will say again that there are many URL shorteners such as goo.gl adf.ly etc. I would say ok but if you can easily get the default shortlink of WordPress then why bother.

How to do:

  • Log in to your site
  • Go to the dashboard
  • Select Editor from Appearance
  • Select the single.php file from the right side
  • Now paste the following code there-

  • Click the Update button.
  • Work is done. Where to paste? If you are a developer then paste where you want to show. And if you don’t understand anything, then paste the above code at the end of all.

Thank You 🙂

Compress your site without plugin

Whether we have a WordPress site or any site, the speed of the site is a big issue. Almost everyone is worried about it. Because if the size of your site is large then your site will take longer to load and if your site takes longer to load then you will lose visitors to your site every day. And if your site is new, then there are more problems. Moreover, the speed of the site is a big issue for SEO. However, if you want, you can reduce the size of your site a lot by doing a little work. This will increase the speed of your site.

Copy the code and add it at the very end of your site’s .htaccess. Now see if the speed of your site is better than before. However, before adding the code, check the speed and size of your site once and check again after adding the code, then you will understand. You can go to this site to check the speed.

http://tools.pingdom.com

http://www.webpagetest.org

http://gtmetrix.com

Code:
# compress text, html, javascript, css, xml:
AddOutputFilterByType DEFLATE text/plain
AddOutputFilterByType DEFLATE text/html
AddOutputFilterByType DEFLATE text/xml
AddOutputFilterByType DEFLATE text/css
AddOutputFilterByType DEFLATE application/xml
AddOutputFilterByType DEFLATE application/xhtml+xml
AddOutputFilterByType DEFLATE application/rss+xml
AddOutputFilterByType DEFLATE application/javascript
AddOutputFilterByType DEFLATE application/x-javascript
AddType x-font/otf .otf
AddType x-font/ttf .ttf
AddType x-font/eot .eot
AddType x-font/woff .woff
AddType image/x-icon .ico
AddType image/png .png
AddType text/css .css
# Or, compress certain file types by extension:
SetOutputFilter DEFLATE

Customize your WordPress login without plugin

Today I will show you how to customize the login page of WordPress. When we go to the login page, there is an image of WordPress, if you click on it, the browser will go to the site http://www.wordpress.com and if you put the mouse on that image (Tooltip) text comes Powered By WordPress. Now I will show you how to change these. To do this, follow the steps below-

  • First, log in to your hosting panel. From there go to your site’s file manager. Now we will edit a file in the root folder of your site.
  • There is a file called wp-login.php in the root folder of your site. First back up that file, then download that file. Because if you make a mistake in coding then there will be problems on the site. So keep this backup. We will not do any work with the downloaded file.
  • Now you need to edit the wp-admin.php file of your site. Each hosting company’s system. If you use Cpanel then right-click on the wp-login.php file and click on edit. Or those who have a checkbox next to this file in the file manager check the checkbox (with a tick mark) and click the Edit button above.
  • Now find this article http://wordpress.org/ and enter your web address and delete it. E.g. http: //your-website /
  • Now you will find another text in the bottom line. That is – Powered By WordPress. Now you can delete it and write whatever you want. Now save the file to the server.

Note: But one thing to keep in mind is that you will only change the code that I have asked you to change. There is no need to touch any sign. E.g.- ‘() etc.

If you want to change the login page logo, then follow the steps below-

  • Now create an image of size 274 × 63, save it as logo-login.png and replace it with the file of the following address. The root folder of your site / wp-admin / images / logo-login.png
  • This means go to the root folder / wp-admin / images / of your site. Delete the logo-login.png file there. Then upload the image file you created.

Word is done 🙂

The following points should be considered before buying a web hosting

There are several things to keep in mind before buying hosting. All the people who know well about websites have said to consider the following issues before buying web hosting.

1. Who needs such a server

Determine your budget before buying website hosting. Organizations whose websites receive a lot of visits a day and at the same time have thousands of visitors to the website usually have to buy a dedicated server. Dedicated servers cost between $50 – $150 per month. However, shared servers can be used for organizations that have a small number of visitors to the website and a small number of visitors at the same time. The cost of a shared server is also much lower. Shared server hosting can usually be purchased for only $50 per year. Shared servers are best for mid-range and small organizations.

2. Disk space

Disk space is to be calculated after the server. 500 MB to 2000 MB hosting is enough for personal and small websites. 2500 to 5000 MB of hosting is enough for the organizations that need to upload a little more pictures on their websites. Most of the experts said that in many cases it is seen that they are taking extra web hosting. However, in this case, it must be remembered that if you take more web hosting than necessary, there is no additional benefit, but some extra money is wasted by the user. Moreover, if more hosting space is needed later, there is an opportunity to increase the package.

3. Buy hosting by looking at the hosting provider

Before buying a domain and hosting, however, the quality of service of a good hosting provider should be verified. Otherwise, even if the desired service is not available later, there is usually nothing to do. And the website owner himself can’t fix it even if there is a problem because he doesn’t know the technical issues. Therefore, after purchasing hosting and domain, it is necessary to check whether the company will provide support for a certain period of time. And whether or not the user has to pay extra for support, or at least how much.

4. Control panel

Website Control Panel is required to make any changes to the website or to change any services. Domain Control Panel is also required to host the domain on another organization’s site. Therefore, you must have full control panel (username-password) of the domain and hosting from the organization from which you will get the service. Many organizations do not provide control panels to keep customers in their organization. Such institutions should be avoided.

Problems and solutions of WordPress Jquery

The first problem with developing a WordPress theme is the provision of a backdated version of JQuery in WordPress. This is also a major problem. Almost all frontend frameworks use the latest version of JQuery in Dependency. Although it can be overcome, the problem remains in one place. That is in the browser console


TypeError: $ is not a function

Ah, after seeing such a message on the console, who would want to live? Whether you inspect or give a view source, the jQuery is not found. You will also see that the jQuery is loaded there.

Went to Google, Google will tell you, omitted that $ sign and wrote jQuery there. Now went to edit the JavaScript file. He went there and saw mustard flowers. Couldn’t dare. How to edit such a big file? Once you thought that all those signs can be replaced with one command, but after doing that you saw that everything is fine but the code is not working. There is no error but no expected output. What to do this time?

Whatever it is, let’s see how it can be solved.

Method 1:

First, declare a function and put $ signs as parameters in it. E.x.


;(function ($) {
$(window).on('load', function(){
// Code to Execute
});

$(document).ready(function(){
// Code to Execute
});

}(jQuery()));

Your problem is about to be solved for now. If you have not written the modular code.

Method 2:

If your code is modular, or you have copied and pasted it from somewhere but the poor person is writing modular code. The code used to work for so long but now it doesn’t work anymore. What to do in such a situation? Notice that the modular code is object-based. There he grabs the whole object and puts it into a function. E.x.


let data = {
init : function(){

},
anotherthing : function(){

},
oneanotherthing : function(){

},
andanotherone : function(){

}
}
data.init();

If you see such a code, then you have to squeeze a function completely. E.x.


function my_function(my_value){
let data = {
init: function () {

},
anotherthing: function () {

},
oneanotherthing: function () {

},
andanotherone: function () {

}
}
my_value = data.init();
return my_value();
}
my_function();

This time a variable inside the function calls $ sign, and passes its value to jQuery.noConflict (); That means the whole thing will match


function my_function(my_value){
let $ = jQuery.noConflict();
let data = {
init: function () {

},
anotherthing: function () {

},
oneanotherthing: function () {

},
andanotherone: function () {

}
}
my_value = data.init();
return my_value();
}
my_function();

Using the latest version of JQuery
Let’s see how the latest version of JQuery can be used this time. This folder of your theme / assets / vendor / jquery contains the latest version of your jquery. So this time we will find it on the frontend. Therefore, you have to open the function file of your theme with a little effort. And from there you have to de-register the jQuery file first.

wp_deregister_script('jquery');

Now you have to register your local version.

wp_register_script('jquery', get_template_directory_uri(). "/assets/vendor/jquery/jquery-3.3.1.min.js", array(), '3.3.1', true);

Let’s say you need a new jquery in your theme. I mean, inquire. Thus

wp_enqueue_script('jquery');

In WordPress, you must use jQuery instead of that $ sign.

The best WordPress theme for building a portfolio site

If you are a photographer, painter, or web designer by profession, one thing you must need, is a portfolio. A portfolio is the best way to present your work experience and work methods for potential future clients.

Let me give you an example. A photographer’s portfolio is usually a black and white theme, featuring his or her best work in a variety of categories, with a variety of images. As such, a web developer’s portfolio is used to give a clear idea of his client’s project and workflow.

Portfolios can be of different types and styles. Whatever it is, the portfolio is always important. You can use a beautiful WordPress portfolio theme to present your work through a portfolio in the hope of finding new clients or customers to the target audience.

Features of a good portfolio WordPress theme

Although portfolio themes tend to look different, some of the similar features are always present in the themes. Knowing these features is beneficial in the decision making process. Then you have the opportunity to compare the options well before buying a good portfolio theme. Here are some popular features:

  • Dedicated Portfolio Page Layouts – This allows you to easily customize the look and feel of the portfolio page without having to tweak the code.
  • Masonry Grid, and List Options – This diversifies the content of the page, makes it visually appealing, and helps to increase the reader’s interest.
  • Portfolio Eyed Descriptions – Project descriptions help to present the work and details of the project to the visitor.
  • Slideshow – Interactive element helps to arouse the interest of a visitor
  • Parallax Slider and Background – Smooth Moving Parts create visual interest and support for your work.
  • Video Backgrounds – Video background support will help make your site more attractive to visitors. It will bring variety to your portfolio.
  • Gallery – The gallery serves as a portfolio supplement, allowing multiple images or videos to be displayed together, as a portfolio piece.

Let’s introduce with the theme

The theme name is Avawa it’s a creative portfolio theme for professionals. It’s Gutenberg optimize theme, this theme has WP Bakery Page Builder support. This theme included lots of custom addons. You design page as your wish without any coding knowledge.

If you want to develop a portfolio website for your or your client you can use the theme. Using this theme you can easily develop a professional portfolio website.

Optimize WordPress to load your website faster

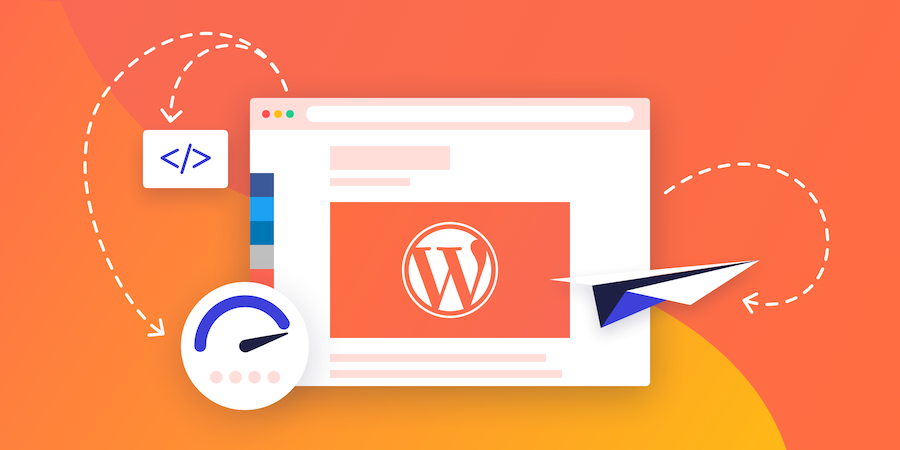
In this post, I will explain why it is important to optimize WordPress so that your website loads fast. I will give you some very simple tips to implement it.

Why is it important to optimize WordPress websites?

It has happened to every one of us every now and then when we visit a website directly or in search results and it doesn’t load well or in quick times.

As per data reports from various sources, a website that loads under 3 or 5 seconds gives a better user experience and takes less bandwidth on mobile devices. If it takes more time then the visitor loses interest and most of the time visitors leave the website.

This will directly impact your SEO efforts as Google measures the load times and for the user experience is very important, so this factor helps them in pushing down websites to lower rankings with slower loading speeds in comparison to those with fast loading times.

And it also affects you indirectly because the time spent by users on your website is also valuable data for Google SERPs.

Though there are a lot of factors that basically keep a user to stay longer on your webpage sites that loads fast will encourage users to browse it more and stay longer looking at your content. However, if browsing it is torture, people will leave, and you will lose the reader base and importance in the eyes of Google.

If the user who comes to your website stays and navigates through it, it is a big possibility that they will end up seeing your services or products that you sell through your website.

Better user experience will make them trust your website and more likely they will end up buying from you than from a website with glitches, as they might think they will have problems with the process of buying or hiring and prefer not to deal at all.

How to optimize WordPress?

Now that I think I’ve convinced you to continue reading I’ll explain 6 tips to speed WordPress and load faster your site.

Use a professional theme

Buying a good professional theme, that is well programmed to run smoothly, and that does not have excessive code, is one of the best investments you can make for your site.

Many professionals use RadiuzZ themes. In fact, I use them myself for all my projects and I am delighted. Its design is very professional, there is plenty to choose from, and its performance is impeccable.

In addition, there are also plugins that will allow you to modify them to the maximum without knowing anything about code, so they are adapted to all levels of use.

Remove plugins you don’t use

If you have plugins that you don’t use and are disabled, remove them from your site, because all they do is consume resources from your server and slow it down.

Having one is fine, but when several are combined the truth is that it is quite an unnecessary resource consumption.

The same thing happens with plugins that do not add important functions: do not abuse those that are just an ornament, because, in the end, they can end up making the bill in the time of loading your site.

There is a plugin called P3 (plugin performance profiler) that serves to measure how it impacts load times the plugins you are using. And he measures them one by one.

It does not hurt that from time to time you install this plugin and do a check to make sure that everything works correctly.

Use a Cache plugin and a lazy load plugin

We continue with the plugins, but this time to recommend you to install a cache plugin.

These plugins what they do is save a few small files of static content (content that does not change) of your site on your readers ‘ computer, so the next time they go back into it, instead of having to load all your site from the hosting, they will only have to load a part, since the other will be saved on your computer.

This is faster for them and better for you because it sends fewer requests to your hosting.

The plugin that I use for this and that gives very good results is the WP Rocket Cache, but it is paid.

If you are looking for a free alternative 3 very good are WP Super Cache, W3 Total Cache, and WP Fastest Cache.

Then, although less important than the Cache plugin, it is also useful to install a Lazy Load plugin (especially if you have a site or web with many images).

What this plugin does is to delay the loading of images that are not in the visual field of the reader (i.e., those that have not yet appeared on the screen because the user has not reached them), and loads them as they appear.

Images usually take longer to load, so with this plugin you avoid having to load all of them from the beginning and the speed of loading when entering one of your pages improves considerably.

Anyway, so that the images are not a problem, it is best to optimize them. Keep reading that I’ll give you a few tricks on this later.
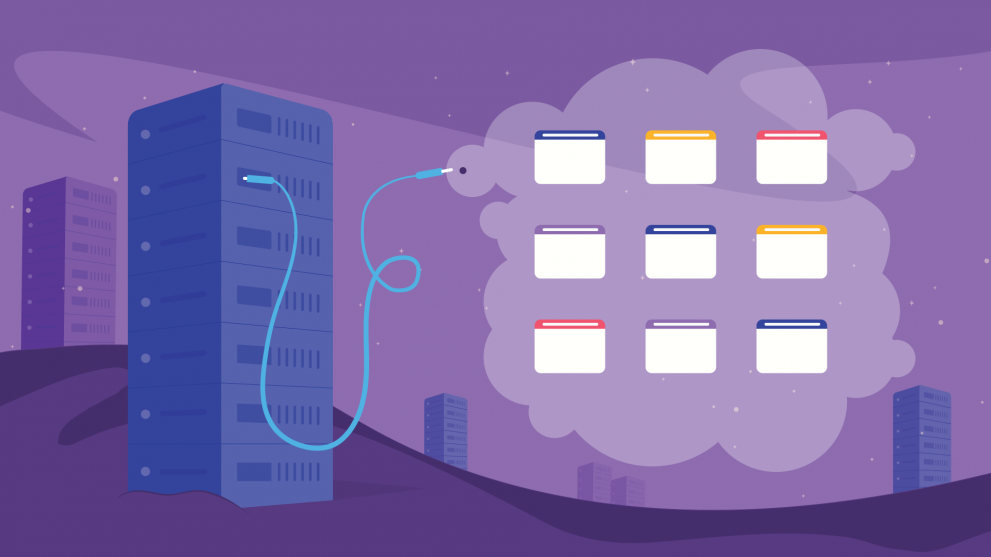
Use quality hosting

Of all the tips that we will see, this is one of the most important.

There are several things you have to look at when buying hosting for your site, but let’s look now only those that have to do with speed.

First, try to make their servers as close as possible to the country where the audience you’re targeting is.

It’s a matter of Mathematics: The Closer your site is stored to the home where your user is, the less distance it will have to travel the information, and the faster it will load your website.

Then, try to make the disks where the information is stored SSD, which is much faster than normal storage disks.

Another thing you have to look at is the resources offered by hosting. Make sure it has enough memory and can withstand point-to-point traffic spikes without overloading.

If the hosting you choose has few resources and is overloaded easily, your website will be down more often than you would like, and that’s bad for your image and that of your brand.

And if the company you hire is a WordPress specialist, better than better, since not only is your WordPress site going to work better with them, but also from their technical support they will know how to better solve your problems.

And believe me, if I tell you that when you have a problem you do not want to talk to anyone, but only to someone who understands you (that has happened to me).

Optimize your site images

Here I have already mentioned before how poorly optimized images can negatively affect the loading speed of your website.

In this case, there are two things you have to look at the size and weight of the image.

With regard to size, the idea is that the image is the size of your site, neither bigger nor smaller.

What you have to look at is how wide are the images displayed in your site posts, and crop or resize the images to that width. You should know that the width at which images are displayed on your site depends on the template you have used.

When larger an image weighs more (more space it takes up in storage), so it is slower to download. And if it’s smaller than the ideal size it might look pixelated on your users ‘ screens.

That’s why it’s best if it’s the right size.

To resize image computers usually already bring image editing tools as standard, on both Mac and Windows. But if you don’t handle any, this online tool can help you.

And with regard to weight, once you have the image cropped, what you have to do is compress it so that its disk size is as small as possible (that is, so that it occupies as few Kb as possible).

For this I use the following tool: tinypng.com

It works like a fable. All you have to do is upload the already cropped images and he will compress them. Then you unload them again and that’s it. You will see how the image has almost lost nothing of quality and yet occupies much less.

Optimizing images is very simple and the truth is that it is one of the things that have the most impact on the speed of your site. In addition, if you are a customer of Webempresa they have a free service in which they compress them for you, helping you to save a lot of space in the hosting and greatly improving the upload speed of your site.

Keep everything up to date

This is important for the speed of your site, but also for its security.

Always keep the themes, plugins, and WordPress itself updated to the latest version, because usually developers, in addition to new features, Always try to make improvements in security and speed.

It costs nothing to do it and you can save yourself some other problem.

How to publish a post in WordPress directly from Google Docs

Google Docs is an excellent document management system for both personal and commercial use. In Google Docs you can use the advanced editing tools for free and without any limitations. However, when you move the document from Google Docs to the WordPress website, you will face many problems, such as losing all the images and formatting of the document.

But now you don’t have to face this problem anymore because now with an add-on you can draft your Google Docs documents directly to WordPress website in draft form! How? I will show this method in this post.

What we need:

This add-on will require some requirements to work, which are given below:

For wordpress.com websites:

  • A Google Account to create documents and connect to the WordPress.com site
  • Any browser (but better with Google Chrome)
  • A WordPress.com website with administrator access

For WordPress websites with its own hosting:

  • A Google Account to create documents and connect to the WordPress.org site
  • Any browser (but better with Google Chrome)
  • Administrator access
  • Jetpack plugin must be installed and activated

Steps:

To use the add-on on your WordPress website, you must first install the add-on. To do this, open the WordPress.com for Google Docs add-on page and install the add-on by clicking the INSTALL NOW button.

A Google Docs document will open and ask you for some permissions, directly continue and then click on the Allow button to give permission and install the add on.

After installing the add-on, you need to connect your website with Google Docs. To do so, click the Add-ons menu from the Google Docs menu bar and select WordPress.com for Google Docs and click the Open button.

The add-on will be launched on the right sidebar. Now start the authorization process by clicking on the Authorize button.

Now a new tab will open and if you give your wordpress.com account you will have to log in if you have not logged in before. Then you have to select your website from the drop-down menu. Then you have to authorize by clicking on the Approve button.

Now you will see in the add-on that your website has been added. However, if you want to add more websites, you can authorize other useful sites by clicking the Add WordPress Site button.

The process of adding add-ons to own hosted websites is the same. All you need to do is install and activate the Jetpack Plugin.

Now if you want to draft a document directly from Google Docs to your site, you can do it by clicking on the Save Draft button. After working again, if you click on the Update Draft button, the draft will be updated.

This add-on will do the work of formatting the document and transformation while keeping all the images intact while moving the draft from Google Docs to WordPress.

Some troubleshoot from own hosted sites

WordPress.com websites are not supposed to be a problem with authorization, but there may be some issues with your own hosted WordPress sites. This add-on is new and of course, it has bugs, and the add-on is dependent on the Jetpack plugin. So many people are facing various problems including their website configuration, Jetpack plugin configuration. Below I have given some common solutions, I hope you find it useful

  • The website you want to use this feature on should be 3 days old or 72 hours old. This is because the Jetpack plugin has trouble getting authorized with the domain of the newly registered website.
  • Make sure you are using the latest version of the Jetpack plugin.
  • Disable all plugins except Jetpack, you can re-enable them later if the add-on works
  • If you are using Cloudflare Security, disable it too, you can enable it again later if the add-on works
  • Use the WordPress Default theme if possible, this type of problem may also be due to the theme.
  • If for any reason you do not get rid of the problem at all, contact your hosting provider.

How to develop a child theme for WordPress

Most WordPress users want to customize the theme of their site. But the problem is if someone customizes the theme, he will lose all the customizations if he ever updates his theme.

What is the child theme?

Child themes are developed based on the original theme. Here you can customize as you wish. You need to copy the file of the theme that you want to customize to the child theme.

Let’s see how to develop a child theme

First, you need to create a folder, the name of the folder will be themename-child. Think your theme name is tortoiz then your child theme name will be tortoiz-child. After creating the folder you must have to create two files inside the folder. 1/ style.css & 2/ fuctions.php. You have to write some code.

style.css

functions.php

Now if want to customize any specific file of the main theme, you just have to copy the file into the child theme and you have to require the file in functions.php .

If you face any problem or need any help feel free to comment if you like the post and if you think it’s helpful please share the post with your friends.